
If you love hosting weekend barbies or enjoying your Melbourne backyard under the city’s ever-changing sky, a well-laid paved area can be your best friend. Think of outdoor pavers as giant, stylish puzzle pieces that transform uneven dirt into a cosy patio or driveway. Like baking a cake with perfect layers, the secret to great paving is a solid foundation and a sprinkle of know-how.
In this guide I’ll walk you through how to get the look just right from choosing materials to laying that final jointing sand. Whether you dream of lush bluestone paths or a sleek Driveway Pavers Installation project, you’ll find plenty of tips below to keep your project on track.
Why Choose Pavers for Your Melbourne Home?
Pavers are a favourite in Aussie backyards for good reason. They handle our sunny summers and chilly winters without cracking like plain concrete can. Pavers come in all sorts of materials Melbourne homes often see natural stone (like elegant bluestone or travertine) alongside tough concrete and porcelain options. Natural Stone Pavers add a rustic, textured look, while concrete or brick pavers offer a uniform, cost-effective finish. The result?
A durable, low-maintenance surface that resists slipping and adds instant “wow” factor to driveways, patios and walkways. And because each stone is separate, repairs are easy. You simply replace a tile rather than dig up an entire slab. Best of all, pavers fit the Aussie outdoor lifestyle: they keep a firm footing, good drainage (just be sure to slope them away from the house), and even allow water infiltration in special permeable designs. For those reasons, many Melbourne homeowners choose Pavers Installation because it delivers a durable, attractive finish that outperforms traditional concrete in both style and longevity.
Types of Pavers and Materials
From classic brick to modern porcelain, the range of paving options can be fun but confusing. To start, you’ll see Natural Stone Pavers such as sandstone, travertine and granite, available in a wide range of colours and textures. These give a premium look like heritage bluestone lanes or limestone garden paths but they can be pricier. Then there are concrete pavers: molded, interlocking bricks available in many colours and patterns.
Concrete Pavers Installation is a popular choice for driveways because these pavers are strong enough to handle regular vehicle traffic. You might also consider brick pavers for a classic aesthetic or porcelain pavers for a sleek, low-porosity option (the kind that doesn’t stain easily). Many suppliers also stock permeable pavers if water pooling is a concern: these allow rain to seep through and recharge the soil, which can help manage stormwater.
When choosing, think about your usage. Heavy-duty concrete or stone pavers are great for driveways and high traffic areas, while patios or courtyards might use wider-format or decorative pavers. Melbourne pros often recommend interlocking patterns (like the 90° herringbone) for sloped driveways, since the angled joints lock together under weight and become even stronger with use.
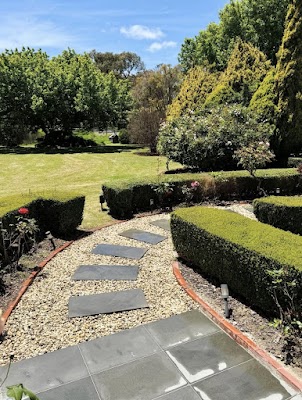
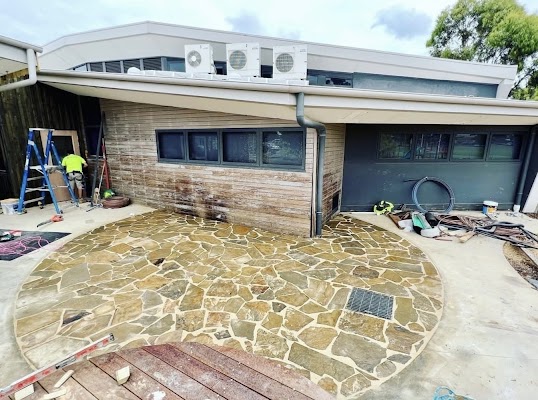
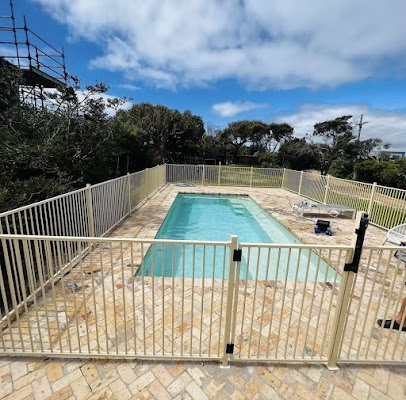
For style, darker colours tend to hide tyre marks and stains, you can always band or inlay lighter pavers for a patterned border or motif. In short, pick the material and style that fits your budget and looks, but don’t skimp on strength: all pavers installation for vehicle use should use pavers at least 50mm thick.
Planning Your Paving Project
Before you grab a shovel, some good planning will save headaches later. First, measure your area carefully. Sketch the shape of the space and calculate how many square metres you need to pave. Leave extra (about 5-10%) to account for cuts or mistakes. Next, check local rules. In Victoria, laying paving generally doesn’t require a building permit, it’s classed as regular landscaping work.
However, because poorly planned Residential Pavers Installation or Commercial Pavers Installation can affect drainage, the Victorian Building Authority recommends hiring a qualified installer. It’s worth noting: council or water authorities may have guidelines about stormwater, especially near gutters or pools. So, identify where water currently drains and plan for your new slope to be at least 15mm per meter away from houses.
Tools and Materials Checklist
Before digging, gather the essentials. Here’s a quick list of what you or your contractor will need:
- Pavers: Pick your type (natural stone, concrete, brick) and desired pattern.
- Road base (rubble) and bedding sand: Usually a gravel base (about 75–150mm deep) and 30mm of washed concrete sand on top.
- Plate compactor or roller: To properly compact the base and bedding.
- Edge restraints: Concrete edging or metal/plastic edging to hold the pavers in place.
- String lines & stakes: For layout accuracy and level checking.
- Rubber mallet: To tap pavers snugly into the sand.
- Tools: A shovel, wheelbarrow, a screed board (for sand), jointers or small broom for sand, and a saw for cutting edge stones.
- Safety gear: Gloves, knee pads, eye protection.
Having these ready means no surprises halfway through. If you’re hiring Paving Contractors, they often include the required tools and Paver Installation Services as part of the overall project.
Step-by-Step Installation Guide
Following these steps closely ensures a successful Pavers Installation that will remain strong and attractive for years.Each layer has a purpose, and skipping one leads to cracks or sinkage. (Pro tip: the installation itself is fun and visual, but preparation is where most of the work lives.)
Step 1: Prepare the Site. Mark out the area with stakes and string at finished height. Remove turf, plants and loose soil. Excavate the ground to the needed depth: usually paver thickness + 30mm sand + 75–150mm base (deeper for driveways). Rake it flat, then compact the subsoil where the base will sit. A perfectly level or uniformly sloped surface (about 15mm per metre fall for drainage) is your goal. In practice, you might dig anywhere from 100 to 200mm deep total, depending on paver size and whether vehicles will roll on it.
Step 2: Lay the Base. Spread your road base (crushed rock or gravel) over the excavated area, about 75–80mm thick under footpaths or patios, and 100–150mm for driveways. Using a plate compactor, compact this base in layers, which creates a solid, stable layer. It’s smart to extend the base slightly beyond the final paving edges, this gives your edge restraints something solid to sit on and prevents outer pavers from sinking over time. Make sure the base is level (check under a string line) before adding sand.
Step 3: Add Bedding Sand. Now carefully spread a 30mm layer of washed bedding sand over the compacted base. This sand layer allows fine level adjustment. Lay two parallel screed rails on the sand at the correct level (2–3 metres apart), then pull a straight screed board across them to level the sand. Remove the rails and fill in any low spots with more sand. Keep the sand thickness uniform, as uneven sand can lead to an uneven paving surface.
Step 4: Lay the Pavers. Starting from a fixed edge (like a straight house line or concrete boundary), begin placing pavers one by one onto the screeded sand. Lay them snugly, using a rubber mallet to tap each flat and in line. Work row by row, always stepping on previously laid pavers (not on the sand) to avoid shifting the base. Use your string lines to keep rows straight and check levels frequently. Leave a small gap (about 2–3mm) between pavers for the joint sand. If you hit irregular edges, you can cut pavers at the end with a brick saw or grinder marked carefully, this is normal for edges.
Step 5: Install Edge Restraints. Where the paved area meets grass, soil or a driveway, you need a firm edge to stop the pavers spreading. A common method is a concrete edge strip or paver edging pinned into the compacted base. Fix this edge at least 10mm below the final paver surface (so when you compact the pavers later, they end flush). Edge restraints can also be metal or plastic straps fixed at 45°, but the key is rigid support so nothing moves. Think of this like the wall at the edge of a sandbox that keeps all the sand (pavers) in place.
Step 6: Compact and Jointing. Once all pavers are laid, it’s time to lock them down. Spread clean, dry kiln-dried jointing sand over the surface and sweep it into all the gaps. Then use the plate compactor over the entire area (with a protective mat to avoid chipping) to seat the pavers into the sand. This compaction will also settle sand deep into the joints; you may need to apply more sand and compact again until joints are full.
For driveways or heavy-use areas, some installers use a polymeric jointing compound (like “Pave Set”) which is a mix of sand and binders. It hardens (yet still flexible) to prevent weed growth and shifting. This step might seem anti-climactic, but it’s what makes the whole paved area rock-solid. Finally, sweep away any excess sand and hose the surface lightly if required (per Pave Set instructions). Congratulations, your new paved area is complete!
Designing Your Paving Pattern
One of the biggest advantages of Custom Paving Solutions is the ability to create unique patterns that complement your home’s outdoor design. You can get creative with the layout as long as you follow some rules. For strength on slopes, a herringbone or basketweave pattern interlocks pavers very tightly. On flat patios you might choose a simple stretcher bond or stack bond.
Remember that narrow or irregular edges (like around curved pools) often need careful cutting. Many installers will “dry lay” the pattern (placing pavers loosely on sand without compacting) just to check aesthetics before final tap-down. Use this moment to step back the pattern should look balanced and lines should flow to the house or seating area.
Lighting and greenery also play well with paving. For example, using lighter stone or incorporating gravel strips can brighten shaded corners of a courtyard. Seasonal Melbourne rain means slip-resistance matters too: consider an exposed aggregate paver finish (pebbly top) for wet areas like pool surrounds or entrance ways. It’s a bit like the rough side of sandpaper safe underfoot after rain.
Maintaining Your Pavers
One of the joys of a good paver job is how low-maintenance it can be. Once installed, most pavers just need an occasional sweep or rinse. Keep those joints filled: every few years you may have to top up the sand or reapply polymer sand if you used it, especially if grasses or debris wash into the gaps. If moss or algae start in damp spots, a gentle power wash can clean the surface (and is usually fine on sealed pavers). For extra longevity, consider sealing the pavers after 28 days to lock out stains and further firm up the surface.
If a single paver cracks or settles, no drama: pry it up, add or adjust some sand below, then relock it into place with more joint sand. This “piece-by-piece” fix is far easier than repairing a poured slab. In Melbourne’s sun, colour fading can happen over a decade; sealing helps preserve the original tone. Also note that heavy trees with invasive roots can shift pavers over time, try to keep large plantings a little distance from paved paths, or use root barriers.
When to DIY or Hire a Pro?
You might wonder, “Can I really install pavers myself?” If you’re a keen DIYer, you certainly can, especially for smaller projects like a garden path or simple patio. The steps above are doable with rented tools (vibrating plate machines can be hired by the day from equipment yards). Just be honest: digging, compaction and precise leveling are hard work! Mistakes in the base mean a bumpy finish or sloped patio, which you really feel when walking on it.
For Driveway Pavers Installation, Patio Pavers Installation, or large Commercial Pavers Installation projects, most homeowners prefer hiring experienced Paving Contractors. Professional Paver Installation Services provide expert workmanship, proper drainage planning, and long-lasting results that are difficult to achieve with DIY methods.
They’ll ensure subsurface drainage and structural support (imagine the damage if runoff water starts undermining your new brick driveway!). In fact, the Victorian guide explicitly notes that while you can do paving without a permit, using a registered builder is a wise move to protect against those issues. A contractor will also likely offer a workmanship warranty, giving extra peace of mind.
Regardless of who does the work, always insist on edge restraints and proper fall, and watch out for price guarantees that seem too low. Quality paving is an investment in your home’s value and curb appeal, after all.
Conclusion
To wrap up, Pavers Installation is a smart investment that enhances Melbourne homes with durable, stylish outdoor spaces. Whether you’re planning Residential Pavers Installation or a larger commercial project, choosing quality materials and professional workmanship ensures lasting value. We’ve covered the full journey: from choosing the right materials (natural stone, concrete or brick) to preparing a solid base and laying each paver with care.
Key takeaways are to plan carefully (check measurements, slope and drainage), build a strong foundation (compacted base + bedding sand), and use proper edge restraints to lock it all in. Remember that even a small mistake in leveling will show up later, so take the time on site prep as one expert guide notes, “correct preparation is the most important part of your paving project”. Whether it’s a cozy patio or a grand driveway, good paver installation delivers style and durability, adding value and charm to your home.
If you’re feeling confident, you can tackle this as a DIY with the steps above. But if your project is large or you’d rather leave it to seasoned pros, don’t hesitate to get in touch. Our team at Global Tiling Company has years of experience in Melbourne paving, and we provide professional Paver Installation Services, from block layout and drainage planning to complete Outdoor Paving Services tailored to your property.
We’ve built countless driveways and patios that stand up to Aussie weather. Ready to get started? Contact us today for a free quote and let our experts bring your outdoor vision to life with precision and flair!
FAQs
How long does pavers installation take?
Most pavers installation projects for Melbourne homes take 3–7 days, depending on the area size, site preparation, and weather conditions. Larger or more complex projects may require additional time.
Do I need council approval or a building permit for pavers installation?
In most cases, pavers installation for driveways, patios, and pathways does not require a building permit in Victoria. However, projects involving retaining walls, major drainage changes, or other structural work may require council approval.
What is the best base for pavers?
A compacted crushed rock base topped with a layer of bedding sand provides a stable foundation for pavers installation. The exact depth depends on whether the area is designed for foot traffic or vehicle use.
Can I mix different paver types or patterns together?
Yes, combining different paver materials, colours, or laying patterns can create a unique outdoor design. Ensure all pavers have a compatible thickness and are installed on a properly prepared base for the best results.
How do I maintain my paved area after installation?
Regular sweeping, occasional washing, and replacing joint sand when needed will help keep your paved area in excellent condition. Applying a quality sealer can also improve durability and protect the surface from stains and weathering.