Imagine stepping into a spa-like bathroom in Melbourne your feet hit warm, matte tiles and the shower purrs. Sounds great, right? But get it wrong and your dream reno can turn into a water-feature fiasco. In Melbourne’s wet-and-dry climate, investing in professional Bathroom Tiling is about more than style, it’s about creating a safe, durable, and long-lasting space. I’ve seen too many DIY disasters (half-peeled tiles, wobbly grout) to let that happen to you.
In this guide, we’ll walk through everything: tile choices, slip resistance, waterproofing rules, hiring pro tilers, plus the latest Melbourne tile trends. By the end, you’ll know exactly how to plan a successful Bathroom Tiling project that creates a leak-free, eye-catching bathroom with confidence.
Tile Materials: Porcelain, Ceramic and More
When it comes to materials, porcelain and ceramic reign supreme in Aussie bathrooms. Porcelain tiles are fired at higher temperatures and soak up virtually no water (<0.5%), making them fantastic for floors and wet areas. They’re also very tough and stone-hard, which means chips and cracks are rare. The tradeoff is cost: porcelain tiles tend to be pricier and trickier to cut.
On the other hand, ceramic bathroom tiles are made from clay fired a bit cooler. They’re softer and more porous (so the glaze matters), but they’re easier on the wallet and DIY-friendly. A good glazed ceramic (AS/NZS 4662 F-rated for floors) can work fine in a low-traffic bathroom. Many Melbourne bathrooms use porcelain on floors and quality ceramic on walls. As one renovation guide notes, “porcelain absorbs less than 0.5% moisture… ceramic is more porous, better suited to indoor walls”.
What about stone-look or specialty tiles? Natural stone (marble, slate, travertine) can add luxury, but it needs sealing and careful care otherwise water stains or etches the surface. Glass or pebble mosaics are cute for showers or feature walls, but they have extra grout joints to clean. (Helpful tip: order at least 10% extra tile in case you need replacements down the track no one likes hunting for discontinued stock years later.)
Bathroom Floor Tiling vs Wall Tiling: What’s the Difference?
When planning Bathroom Tiling, think of floor tiling and wall tiling as cousins, not twins. Floor tiles in a bathroom must be durable and slip-resistant, because they handle heavy use and wet feet. We look for a high P-rating (per AS 4586) on any floor tile P3 or above for home showers. Matte or textured tiles naturally grip better than glossy ones. Porcelain is the usual pick for floors due to its strength and near-zero water absorption. Floors also need a slope (around a 1:80 fall) towards a drain.
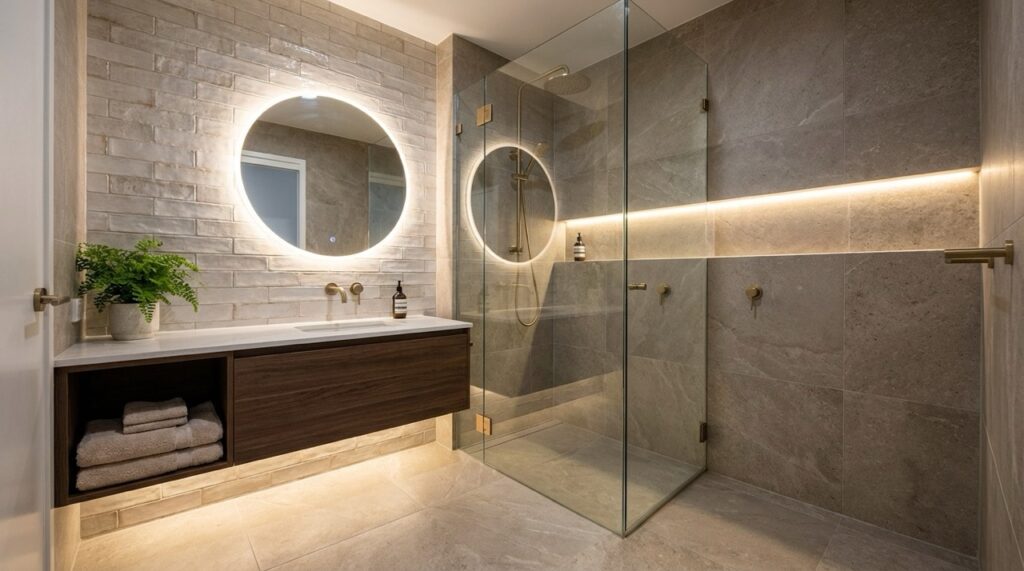
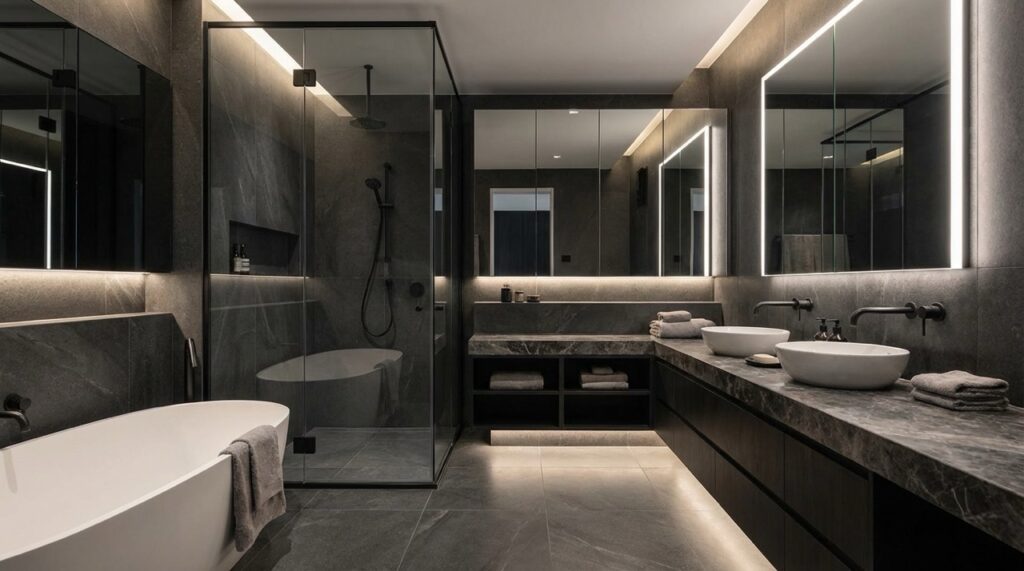
Wall tiles have it easier: they don’t carry weight and aren’t walked on, so you can use lighter ceramic or even 3D decorative tiles. But walls still see splashes and steam, so waterproofing behind them is a must (see next section). Floor tiling often uses larger sizes (e.g. 600×600 or 600×1200mm) for fewer grout lines, whereas wall tiles might be subway or patterned.
In short, floor tiling prioritises function (grip + robustness), while wall tiling emphasises looks (with moisture-resistance). As Melbourne tilers explain: “Bathroom Floor Tiling…durable and water-resistant… slip-resistant for peace of mind.” Conversely, wall tiling “combines aesthetics and moisture protection for a refined surface”.
Melbourne Bathroom Trends & Design Tips
Melbourne renovators love blending style with practicality. A big recent trend is the large-format tile: think 600×1200mm or even 2.4m long porcelain slabs. These giant tiles “practically eliminate grout lines,” meaning less scrubbing and a cleaner, more spacious look. Attila Natural Stone observes that bigger tiles “make small bathrooms feel larger” and give a high-end “hotel vibe” to homes.
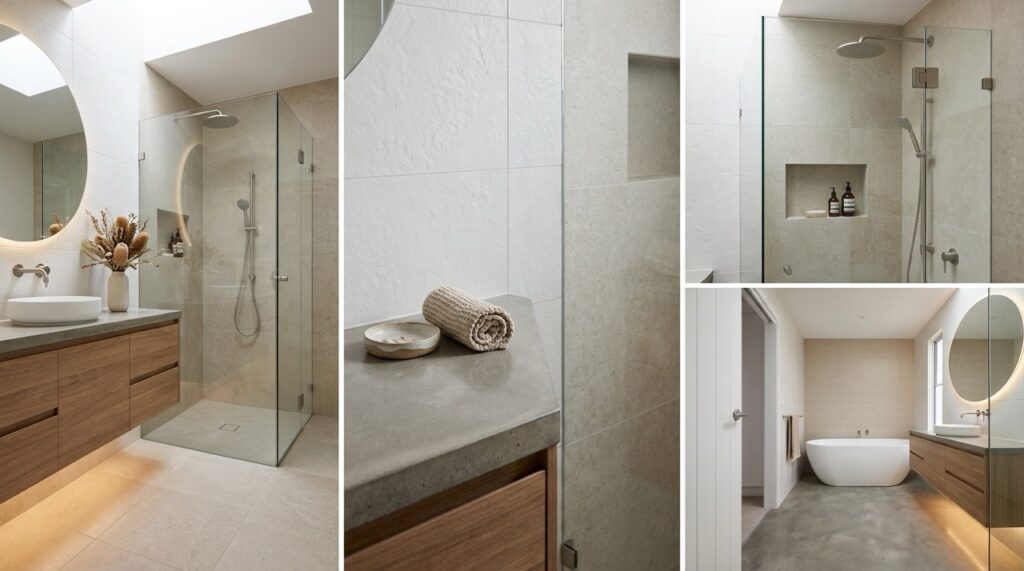
Warm, earthy colours are having a moment. White-and-grey aren’t going away, but many locals are picking beige and clay tones to add warmth. These sandy shades hide dust well and make a chilly Victorian-era home feel cosy. For a pop of personality, some folks are daring with one feature wall in a bold color tile, think deep teal or amber onyx. (Attila’s clients have loved a red terracotta-esque tile called Rosso Onyx for a bathroom accent.)
There’s also a “Zen bathroom” vibe where you layer natural elements: bright white tiles with subtle green botanical accents, light timber-look tiles (porcelain wood-look is popular) and even curvy mirrors to soften the lines. Imagine stepping onto warm wood-look porcelain planks after a long day feels like a Japanese spa! Just remember: no matter how trendy, pick tiles that meet Aussie wet-area specs (we’ll cover that next).
Safety First: Slip-Resistance & Waterproofing
Even the best Bathroom Tiling project isn’t successful if someone slips or water leaks through. Slip resistance is non-negotiable. Always check the AS 4586 rating (often listed as R- or P- rating) on bathroom floor tiles. For showers and around baths, aim for P4/P5 or at least P3 for domestic use. Matte or textured tiles score better here. If you’re a grandparent or have kids, I’d pick P4 just for extra peace of mind you can still mop or clean, but you won’t do a nasty slide.
Equally important is Bathroom Waterproofing, which protects the entire tiled area from moisture damage and costly repairs.In Melbourne (and Australia), any splash-zone, think shower floor, bath surround and at least 150mm up adjacent walls must have a waterproof membrane before tiles go down. This isn’t optional sticker-decor; it’s law. The National Construction Code (NCC) and Australian Standard AS 3740 lay it out: all shower floors and nearby walls require a continuous, sealed membrane.
For example, Victorian regulations define an “unenclosed shower” area as the floor and walls within a 1.5m radius of the shower rose, and those walls must be waterproofed up to 1.8m high if a bath is right under the shower. Basically, treat your wet-zone like a little boat basin, everything inside it gets waterproofed.
Neglecting this waterproofing is like not putting on sunscreen: it works fine at first, but eventually you’ll burn. Hidden leaks can rot out floorboards or spray mould spores everywhere. In fact, Victoria’s Building Commission warns that “compliant waterproofing in wet areas… prevents moisture-related issues like mould growth, structural damage and water infiltration”. Translation: Do the membrane now, or pay thousands in repairs later. Pro tilers will seal gaps, fit flexible corners (bond-breakers), and use epoxy grout or sealants that are mold-resistant. The takeaway: A great tile install must always begin with proper preparation and a good waterproofing layer.
Planning & Preparation for Bathroom Tiling
Before starting any Bathroom Tiling project, there’s a little homework to do. A top-notch outcome starts with solid prep. Here’s a quick checklist of steps to ace your bathroom tiling project:
Surface prep: Remove old tiles and debris completely. Your substrate must be flat, clean and dry to avoid uneven tiles. That might mean re-screeding a sloping floor or patching plaster. A level floor means no surprise lippage (uneven grout height).
Waterproof first: Apply a licensed waterproofing membrane (per AS 3740) over all wet areas floors and walls before any tiles. Think of it like priming the canvas. This membrane should extend beyond just the shower base (150mm up walls and 1500mm out on floors as needed).
Tile layout planning: Map out your tile pattern. Starting in the centre of the room or a focal wall helps symmetry. Account for any feature tiles, niches or mosaics. Remember to order extra tile for cuts and mistakes (10% more is safe).
Safety gear & adhesives: Have the right gear tile spacers, quality adhesive and grout rated for bathrooms (mildew-resistant). Outdoor adhesives or tile sets might even give extra water-blocking.
Hire licensed pros (if you’re not DIY): Tiling is tricky. Choosing someone licensed by the Victorian Building Authority (VBA) ensures they know the regs and use proper techniques.
Completing these steps ensures your Bathroom Tiling project runs smoothly from start to finish. And trust me, any good tiler would make you tick off this prep before starting. As one Melbourne tiling service notes, their “Preparation & Waterproofing” phase involves stripping old tiles, cleaning/levelling surfaces, and applying AS 3740-compliant membranes. Following their lead it’s worth the extra effort.
Hiring Professional Bathroom Tilers & Tiling Services
Because Bathroom Tiling requires precision and proper preparation, many Melbourne homeowners choose a professional tiler. Choosing professional Bathroom Tiling Services gives you the confidence that every stage of the project will be completed to Australian standards that a DIY job might lack. Here are a few reasons to consider hiring experts:
Expertise & Speed: A seasoned tiler knows quick tricks (like when to use spacers or how to cut around pipes) and typically finishes a bathroom in days, not weeks. They’ll meet standards for slopes, grout joints and finishes without you agonising over YouTube tutorials.
Quality materials & guarantees: Pros use commercial-grade adhesives, grout and membranes. They’ll source suitable tiles (e.g. high-slip ratings or the exact porcelain spec you want) rather than a random box from a hardware store. Many companies offer warranties on their work.
Complex tasks made easy: Need those feature wall tiles perfectly aligned? Want under-tile heating? Or must any old sheet vinyl be removed first? A contractor handles all the tricky prep. For example, First Option Tiling proudly mentions they remove old tiles, level surfaces, and “apply waterproof membranes according to AS 3740”. It’s all done in the right sequence.
Safety & compliance: Licensed tilers are up-to-date on the NCC and Victoria’s rules. They’ll ensure wet areas (like showers and around baths) are done properly to code, preventing insurance headaches later.
Of course, quality comes at a price, but consider it an investment in peace of mind. I once saw a DIY tile job gone wrong where the grout cracked and water seeped in fixing that cost far more than hiring a pro from the start. So, unless you have tiling experience, you’ll probably save time and grief by calling a professional bathroom tiling contractor.
Bathroom Tile Repairs and Maintenance
Even high-quality Bathroom Tiling needs regular care to maintain its appearance and performance. If a tile becomes cracked or damaged, Bathroom Tile Replacement is often the quickest and most cost-effective solution. If one tile chips or cracks (maybe the resident cricketball hit it), it’s usually best to pop it out and re-grout a new one. Glue in an identical tile, clean up grout lines, and you’re back in business. Regrouting is another maintenance task over years, grout can become stained or even loose. Tiling contractors can grind out old grout and apply epoxy grout which resists mildew.
Keep tiles clean with pH-neutral cleaners to protect sealants. For natural stone, apply sealer every few years. Also watch for leaks: even a tiny crack can let water slip under the tile; catch this early by resealing grout or using silicone in corners. If you spot soft spots or mould between tiles, it might signal that waterproofing under the floor or wall has failed. In that case, call a pro to lift tiles and reapply membrane ASAP cheap insurance for your subfloor. Remember: doing prompt repairs (fixing a leak, replacing a loose tile, regrouting) is always cheaper and easier than a full re-tile.
Conclusion
Bathroom Tiling is both an art and a science, especially in Melbourne’s wet climate. From selecting between Porcelain Bathroom Tiles and Ceramic Bathroom Tiles to ensuring proper Bathroom Waterproofing and slip-resistant Bathroom Floor Tiling, every step plays an important role in creating a beautiful, durable, and long-lasting bathroom. Investing in quality materials and professional workmanship will help you achieve a stylish space that stands up to daily use for years to come.
Ready to transform your bathroom with expert Bathroom Tiling? At Global Tiling Company, we provide reliable Bathroom Tiling Services and professional Bathroom Tile Installation tailored to homes across Melbourne. Whether you’re planning a complete bathroom renovation, need Bathroom Tile Repairs, or require a Bathroom Tile Replacement, our experienced team is here to help. Contact us today for a free quote and let our skilled Bathroom Tiling Contractors deliver a flawless finish with exceptional craftsmanship and attention to detail.
FAQs
What’s the difference between porcelain and ceramic bathroom tiles?
Porcelain tiles are denser, more water-resistant, and highly durable, making them ideal for bathroom floors and wet areas. Ceramic tiles are a great choice for bathroom walls and areas with lighter foot traffic.
Why is waterproofing so important in a bathroom?
Waterproofing protects your bathroom from leaks, mould, and structural damage by preventing moisture from seeping beneath the tiles. It should always be completed to Australian waterproofing standards before tiling begins.
How long does a bathroom tiling project typically take?
A standard bathroom tiling project usually takes a few days, depending on the room size, tile type, and preparation required. Additional time may be needed for waterproofing, grout curing, and complex tile layouts.
Can I tile my own bathroom, or should I hire a tiling contractor?
DIY tiling is possible for simple projects, but bathrooms require proper waterproofing and precise installation. Hiring a professional tiling contractor helps ensure a high-quality finish and compliance with Australian standards.
How do I maintain bathroom tiles after installation?
Clean bathroom tiles regularly with a mild, non-abrasive cleaner and inspect grout for any signs of wear or cracks. Prompt maintenance and occasional grout sealing will help keep your tiles looking their best for years.